Learning how to read a semiconductor marking code is a repeatable ten-minute routine, not a guessing game. The short line printed or laser-etched on the top of a package usually carries four things: who made the part, the part number (sometimes abbreviated), the manufacturing date and lot code, and sometimes the assembly site. Work through it in sequence — clean the package, find pin 1, read the lines top down, split the part number from the lot code, then check every character against the manufacturer’s own documentation.
There is no universal marking standard. JEDEC, EIA/ECMA and JIS-C-7012 each use different prefix conventions, and the same three characters can belong to three unrelated parts from three suppliers. That is why a marking code alone is a starting point for a search, not an answer.
Table of Contents
- What You Need
- Step-by-Step: How to Read a Semiconductor Marking Code
- 1. Clean and photograph the marking
- 2. Identify the manufacturer or logo
- 3. Read the base part number
- 4. Decode speed, grade, temperature and revision characters
- 5. Read the lot, date and traceability code
- 6. Verify the decoded identity
- Common Mistakes
- Frequently Asked Questions
- Can I identify a semiconductor from its marking code alone?
- What does a semiconductor marking code usually include?
- How can I tell whether an IC marking is counterfeit?
- Is the date code the same as the lot code on a semiconductor?
- Why do two chips with similar markings have different part numbers?
- What should I do if the marking is too faint or damaged to read?
- Conclusion
What You Need

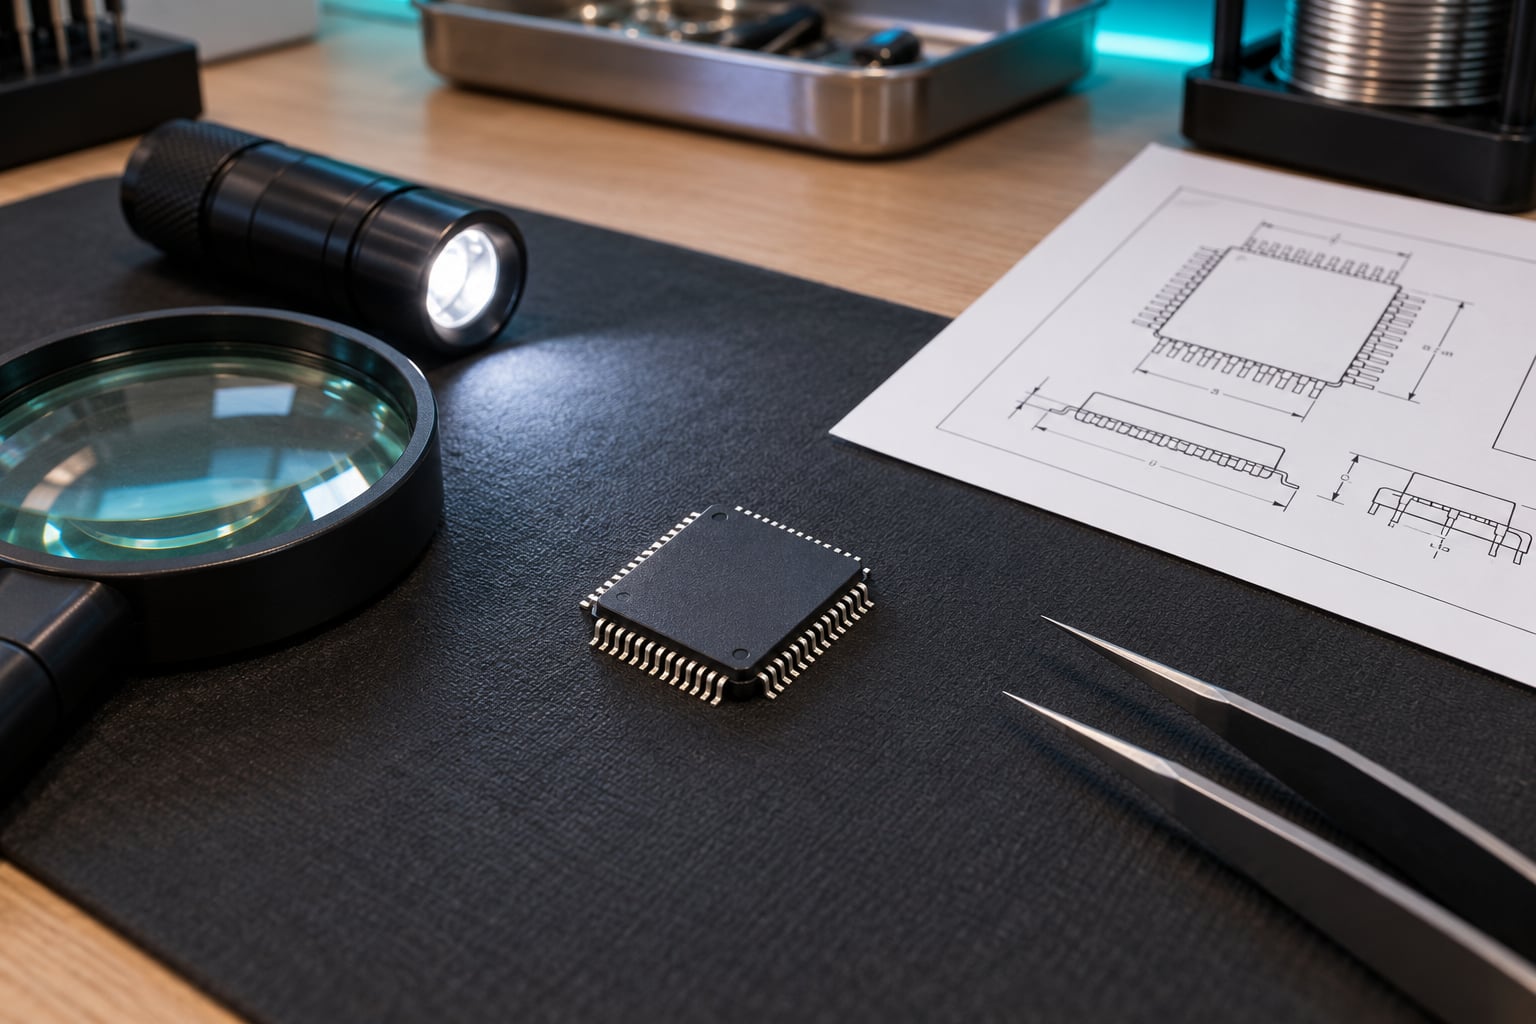
Most failures happen because the mark is read in bad light with the part still in the jaws of tweezers. Set the part down on a dark, matte surface first.
- Lighting. A bright, directional lamp set low and to the side. Raking light throws a shadow inside laser-etched characters, which is how you tell a “3” from an “8” and recover a worn mark.
- Magnification. A 10x loupe handles DIP and SOIC parts. QFN, DFN and BGA packages have markings under 1 mm tall, so you want a stereo microscope or a macro lens. A phone camera with a clip-on macro lens is enough for most through-hole and larger surface-mount work.
- Cleaning kit. 99% isopropyl alcohol, a soft swab, and lint-free wipes. Grime and flux residue fill in the gaps between stamped characters.
- The datasheet for the candidate part. Part numbers are searchable only once you have a string, so keep a datasheet tab open rather than trusting memory.
- A package drawing. This tells you the pin-1 orientation and the package type, which is how you orient a mark that reads sideways or upside down.
- Tweezers and a steady hand. Or a strip of double-sided tape to hold the part flat while you work.
One more thing worth having: the bill of materials, or at least the board design file. If the chip came off a board, the silkscreen designator next to it (U7, Q3, D12) is a second, independent clue that often confirms or kills a guess before you touch a datasheet.
Step-by-Step: How to Read a Semiconductor Marking Code
1. Clean and photograph the marking
Wipe the package top with a swab and isopropyl alcohol and let it dry. This takes ten seconds and routinely reveals a whole second line of text that was buried under flux.
Then take two photographs: one straight down, square to the package edges, and one at about 30 degrees. The straight shot tells you what is actually printed. The angled shot tells you whether a character is stamped, embossed or laser-etched, and whether it is a real mark or residue. Capture the whole package in at least one frame, including the notch or pin-1 dot, so the image is evidence you can compare later.
2. Identify the manufacturer or logo
The manufacturer is almost always the first element, either as a logo or as a recognisable prefix. Common ones you will meet on boards from the last thirty years:
- TI (Texas Instruments) – the TI logo, or a mark beginning SN, TL, LM, CD, ULN, OPA, LMX, DPS or TPS. LM358 and SN74HC00 are typical examples.
- STMicroelectronics – the ST logo, or ST’s short codes. STM32F103 parts are routinely marked with an abbreviated family code plus a lot number rather than the full ordering code.
- Microchip and Atmel heritage parts – the Microchip mark, or AT/ATM prefixes such as ATmega328P. Atmel marks survive on a lot of older boards.
- NXP and Philips heritage parts – PCA9xxx PCF9xxx, and the NXP logo. Philips-era markings such as PCF8574 are still common in production designs.
- onsemi (formerly ON Semiconductor and Motorola) – the onsemi or ON mark, plus NTP and NCP families.
- Analog Devices – the Analog Devices mark, plus AD prefixes such as AD823, ADXL345 and ADM3255.
- Infineon – the Infineon mark, plus BSC/IR/IGB families, which are mostly discrete parts.
- Renesas (NEC and Intersil heritage) – HD, ISL, RA and RZ families.
- Vishay, Rohm, Toshiba, Diodes Incorporated, Melexis, Nordic Semiconductor, Espressif – each has its own prefix or logo, and the mark is often the only clue for a small-signal or wireless part.
Two limits on this. Logos are small and low-contrast, so a raking light plus a 10x loupe is often the difference between seeing the mark and guessing at it. And an unfamiliar prefix proves nothing on its own: prefixes get reused, companies rebrand, and marks get copied. Treat the logo as a hypothesis, not a conclusion.
3. Read the base part number
The longest unbroken run of characters on the package is almost always your search string. Copy it exactly, including case, before you try to interpret it.
Before you search, fix the formatting:
- Replace spaces with nothing. Two lines of “74 HC” and “00” may be one number, 74HC00.
- Hyphens are usually cosmetic in consumer parts. ATmega328-PU and ATmega328PU are the same device with a different packing option.
- A line break is a layout decision, not a meaning. Manufacturers fit long part numbers onto small packages by splitting them.
- Do not fold the lot code or date code into the part number. A three- or four-digit group on line two is almost never part of the model.
Discretes follow a different habit. Transistors and MOSFETs are commonly marked with 1N, 2N or 2S prefixes (2N2222, 2N3904, 2S945) or a short manufacturer code in a SOT-23 or SOT-89 case. A mark like “QO 11” on an SOT-89 tells you the maker, a rank or variant letter, and a trace code; it does not tell you the part without a search. Diodes follow the same pattern, with many small-signal parts marked only with a polarity band plus two or three characters, which is why diode identification usually needs the package body size and pinout alongside the mark.
Practical note: passive components use an entirely separate numeric system. A 3-digit capacitor code of 104 means 100 nF and 103 means 10 nF; resistor codes give ohms with a multiplier. That is a different language from semiconductor markings, and mixing the two is a common source of wrong identifications.
4. Decode speed, grade, temperature and revision characters
Letters and digits trailing the base number usually carry qualifiers, not identity. The characters you will meet most often, and what they commonly mean across the industry:
- Temperature grade. C is widely used for commercial grade, 0 to 70 degrees C. I is industrial, -40 to 85 degrees C. M is military, -55 to 125 degrees C. A part with no grade letter is frequently industrial, but that is a default rather than a rule.
- Package suffix. D for DIP, S or N for SOIC, T for TSSOP, Q for QFN, B for BGA, P for plastic DIP, R for tape and reel, and a trailing T or a tube/tube-and-reel indicator on some suppliers. These letters are manufacturer-specific, so a Q on one part is not a Q on another.
- Packing suffix. A trailing R, T, or a tray code changes nothing electrically. It changes how the part is shipped, ordered and handled.
- Speed or performance grade. A digit or letter that shifts the speed bin or the performance class, for example a faster speed grade on a logic family or a wider input range on a regulator.
- Die revision. A letter or digit that identifies the silicon revision. Silicon revisions are functionally compatible within a family, but the datasheet for the exact revision tells you which errata apply.
None of this is universal. The manufacturer’s ordering code table in the datasheet is the only authority, and it is worth reading that table before you assume anything about a trailing letter. A common trap is reading a package suffix out of a mark where the supplier used the same letter for a qualification level, such as a qualified-for-automotive or a moisture-sensitivity variant.
5. Read the lot, date and traceability code
Line two and line three are where manufacturing information lives. The elements, and how to tell them apart:
- Date code. Most often four digits in year-week form, YYWW, so 2417 is week 17 of 2024. A three-digit YWW form also exists, where 417 means week 17 of 2024. Under the EIA convention, week one is the week containing the first Thursday of the year, so the first days of January can legitimately carry the previous year’s number.
- Lot code. A longer alphanumeric string identifying the wafer lot and the assembly and test lot. This is the field that matters for traceability, because a defect investigation is contained by lot.
- Assembly site code. One or two characters naming the assembly and test plant, sometimes with a country-of-origin letter.
- Die revision or mask revision. Sometimes shares a line with the lot code.
- RoHS or lead-free mark. An e3 or a small Pb-free symbol on the package indicates lead-free termination. It says nothing about age or authenticity.
The ambiguity problem is real. A four-digit code of 8332 is week 32 of 1983 under a literal year-week reading, but the same four digits on a reel received last year are far more likely to be read against the decade you are living in. Two-digit year codes are always ambiguous on their own, so cross-check against the reel label, the packing list or the distributor’s intake date. That is also why a mixed date code inside a single lot is a quality flag: a lot should assemble from a coherent set of wafers, so two years inside one lot usually means the material was repackaged or relabelled.
Age matters for a practical reason. The industry has historically used a rough two-year shelf-life assumption for solderability, dating back to solderability and tin whisker problems with pre-1980s parts, and standards bodies have revisited that assumption more than once. Most buyers now check age against their own policy rather than a hard two-year rule, and the packaging label’s moisture sensitivity level (MSL) and dry-pack status often matter more for a part that has been opened than its printed date.
6. Verify the decoded identity
This is the step people skip, and it is the one that prevents a wasted afternoon. Work through it in order:
- Search the base part number. Search the full string, not the abbreviation, in a distributor search or a datasheet index. If the abbreviated mark returns nothing, search the family and match on package and pin count.
- Open the datasheet for the match. Check package type, pin count, pin-1 orientation, supply voltage range, temperature grade and function against the mark’s suffix characters.
- Check the ordering code table. Every datasheet has one that maps suffixes to package, grade and packing options. This is where you confirm what a trailing letter actually means for this part.
- Compare against the marking standards. If the part is JEDEC-sourced (North America), the part is likely to follow JEDEC prefix practice. European suppliers follow EIA/ECMA conventions, and Japanese parts follow JIS-C-7012. The systems overlap, which is exactly why guessing fails.
- Resolve ambiguous characters. O versus 0, I versus 1, S versus 5, and B versus 8 are the usual four. Use the datasheet: if a valid part number exists with the digit and none with the letter, it is a digit.
- Check the reel label and packing list. If the mark on the part disagrees with the paperwork, stop there. That mismatch has several innocent explanations and at least one that is not.
Common Mistakes
Treating every printed character as part of the part number. The most common error, and the reason searches return nothing. The lot code, date code and assembly site sit on the same package and look equally like characters. Rule of thumb: if a group is four digits and starts with a plausible year, it is a date, not a model.
Assuming one code format works for every manufacturer. A prefix that reliably means one vendor in JEDEC practice can mean a different vendor under EIA/ECMA or JIS-C-7012. Decoding rules are per-company, and companies change them between part families.
Reading the mark in the wrong orientation. A mark on an SOT-23 can run 90 degrees to how you are holding the part, and a DIP read upside down turns W into M. Find the pin-1 dot, notch or chamfer first, orient the package, and then read.
Confusing the date code with the lot code. The date code tells you when the part was made. The lot code tells you which wafers and which assembly run it came from. For shelf-life questions the date matters; for a recall, PCN or defective-lot investigation, the lot code is the one you need.
Reading a counterfeit or remarked part at face value. Red flags visible in the marking itself: character height or font weight that differs between lines or between characters on the same line, a mark that looks laser-etched over a silk-screened or stamped original, an unusually glossy or reworked surface, a date code inconsistent with the lot code on the same device, or a package whose surface finish does not match the rest of the lot. If the mark and the label disagree, have the part screened properly before putting it in a board.
Reading silkscreen designators as part of the code. The letters and numbers printed on the board next to a component (U7, Q3, R21, D12) are reference designators from the schematic. They tell you which position the part occupies, not what it is. Use them to find the schematic, not to identify the device.
Guessing from footprint alone. When a mark is unreadable, fall back on evidence in this order: package body size and pin count, the silkscreen designator traced to the schematic or BOM, the footprint’s pin-1 location, and any surviving part from a neighbouring identical board. Then verify whatever you infer against the datasheet before committing to a purchase or a repair.
One last habit worth keeping: photograph and log the mark, the package and the reel label for every part you identify. When a product change notification lands or a field failure shows up eighteen months later, that record is the difference between a five-minute answer and a week of hunting.
Frequently Asked Questions
Can I identify a semiconductor from its marking code alone?
Sometimes, but rarely with certainty. A mark gives you a manufacturer hint and a search string, not a guaranteed part. Two different suppliers can use the same three characters, and many packages are marked with an abbreviation rather than the full orderable part number. Treat the mark as a starting point, then confirm the package type, pin count, function and suffixes against the manufacturer’s datasheet before you rely on the identification.
What does a semiconductor marking code usually include?
Four things, when the package has room. The manufacturer logo or prefix, the part number or an abbreviated version of it, the manufacturing date code in year-week form, and a lot code that identifies the wafer lot and assembly run. Some packages add an assembly site code, a die revision, a lead-free symbol or a mask identifier. Line breaks are layout choices, so a part number can be split across two lines.
How can I tell whether an IC marking is counterfeit?
Look at the marking itself before anything else. Consistent font weight, height and character spacing across every line is the baseline. Warning signs include characters that differ in size from their neighbours, a mark that looks etched over an older stamped or silk-screened one, unusual surface gloss from rework, and a date code that contradicts the lot code on the same device. If the mark and the reel label disagree, have the part screened by a specialist.
Is the date code the same as the lot code on a semiconductor?
No, and the distinction matters. The date code is usually four digits in year-week form, for example 2417 for week 17 of 2024, and it tells you when the part was made. The lot code is a longer alphanumeric string covering the wafer lot and the assembly and test run. Shelf-life and age questions use the date; defect containment, product change notifications and recall work use the lot.
Why do two chips with similar markings have different part numbers?
Because the top mark is often abbreviated, and because several manufacturers produce a device in more than one form. Marks can be customer-specific, shortened to fit the package, hub or distributor marks, or tied to a different assembly plant. The same die can also ship as several orderable part numbers with different package, temperature grade and packing suffixes. Compare the datasheet ordering code table, not just the characters on the lid.
What should I do if the marking is too faint or damaged to read?
Clean the package with isopropyl alcohol and re-light it from a low angle so etched characters throw a shadow. Try a macro lens or a 20x loupe. If the mark is still gone, work from the package: body size, pin count and pin-1 position, then the silkscreen designator traced back to the schematic or bill of materials, and finally a known-good part from a matching board. Verify whatever you infer against the datasheet before fitting it.
Conclusion
Start with four things and the rest follows: photograph the whole package, find pin 1 so you read the mark the right way up, copy the longest continuous string as your base part number, and search that string. Then read the second line as traceability data rather than identity, resolve the O-versus-0 and S-versus-5 characters against the datasheet, and check every suffix in the manufacturer’s ordering code table.
The one habit that separates a confident identification from a guess is verifying against the manufacturer’s own documentation instead of a marking database alone. Databases are useful for a first hit, but the datasheet is the record that settles it, and it is the record that will still be there when a lot code shows up in a quality investigation.